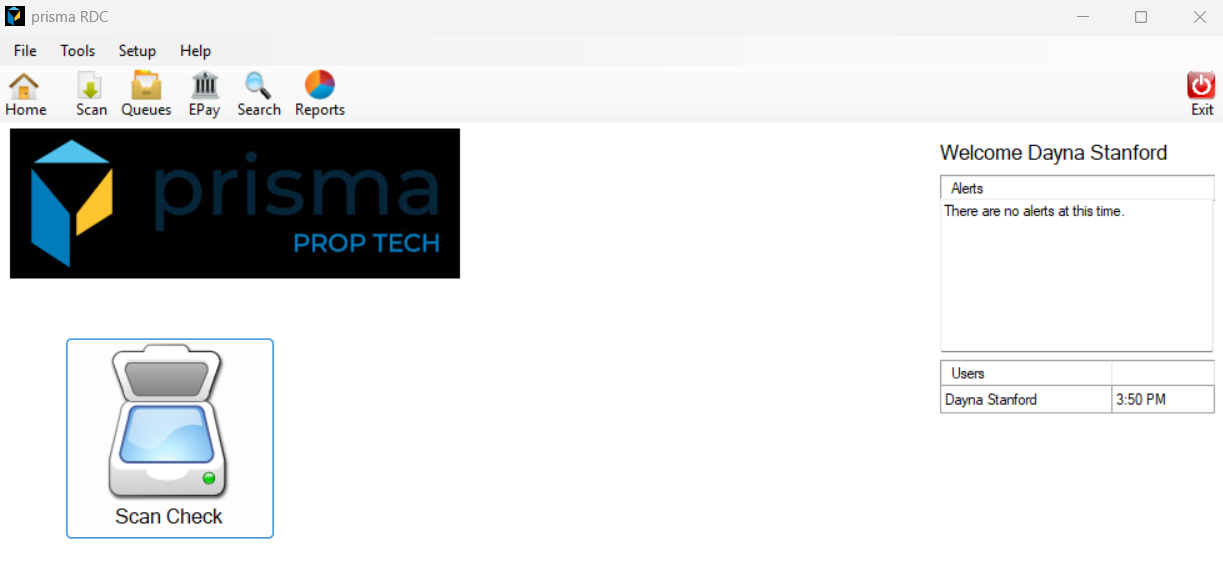
- Open the check scanning software on your computer

- Click ‘Start Scan’ and you should hear your scanner turn on
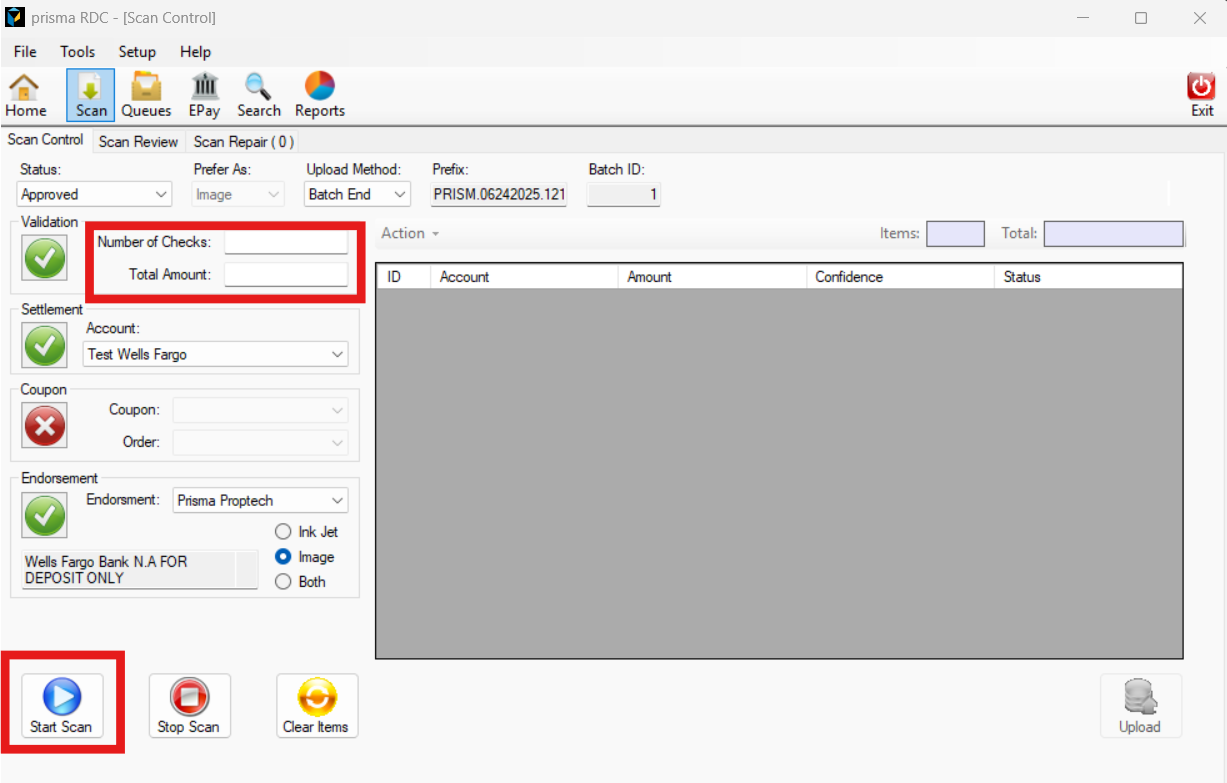
- By default, you will be directed to the ‘Scan Control’ tab. Under the ‘Validation’ section, enter the number of checks you will be scanning along with the total amount of all the checks
- No other fields will need to be completed. Click ‘Start Scan’
- Once the checks or money orders are scanned through the software, you will see them appear in the software. If the number of checks and the amount of the checks match what you entered before the scan, the ‘Items’ and ‘Total’ boxes will turn green. If they do not match, they will turn red, as shown in the image below.

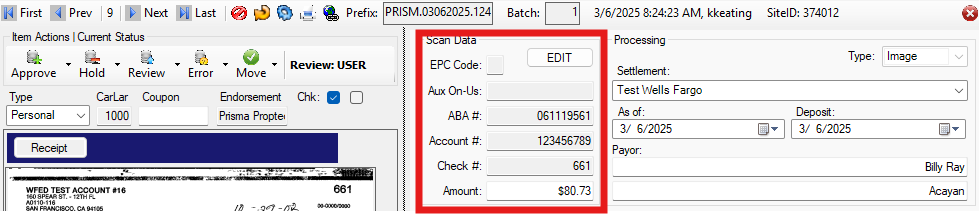
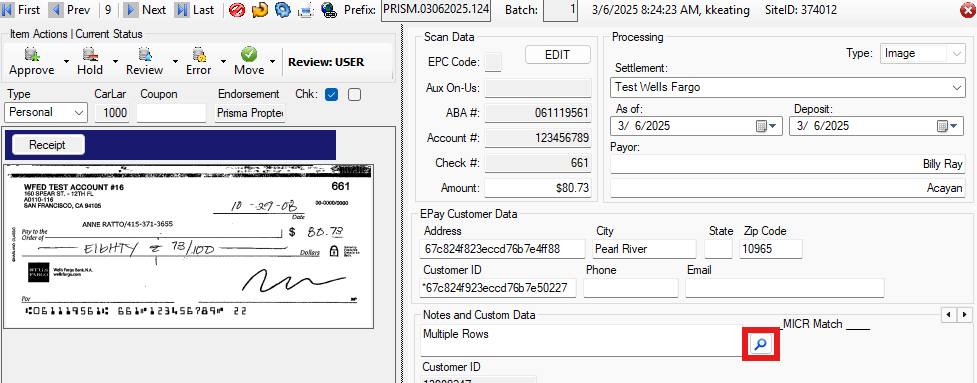
- Double click the first check entry to open the detail screen

- Verify the routing number, account number, check number and amount match the check. If you need to edit the ABA #, Account Number, Check Number or Amount, click ‘Edit’. When done, click ‘Lock’
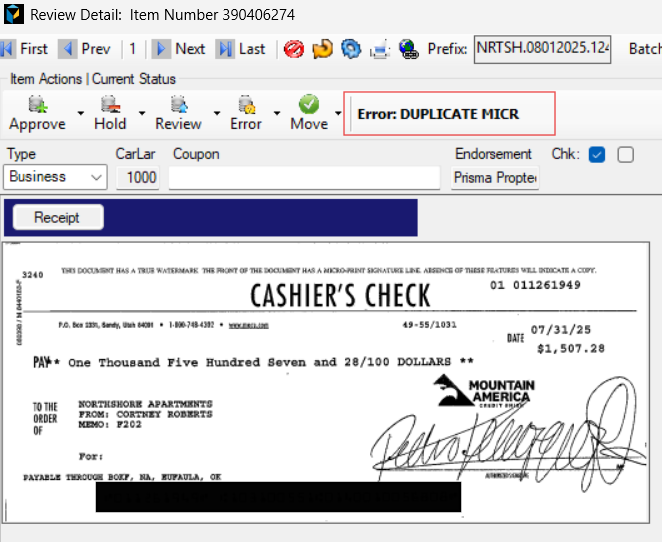
- For cashiers checks, each bank initiates it from the same routing number and account number. If the system auto matches it, based on the first resident that was associated with that scan, you must first delete the ledger row before you add a new one
- Under the ledger row section, highlight the existing ledger row and click on delete
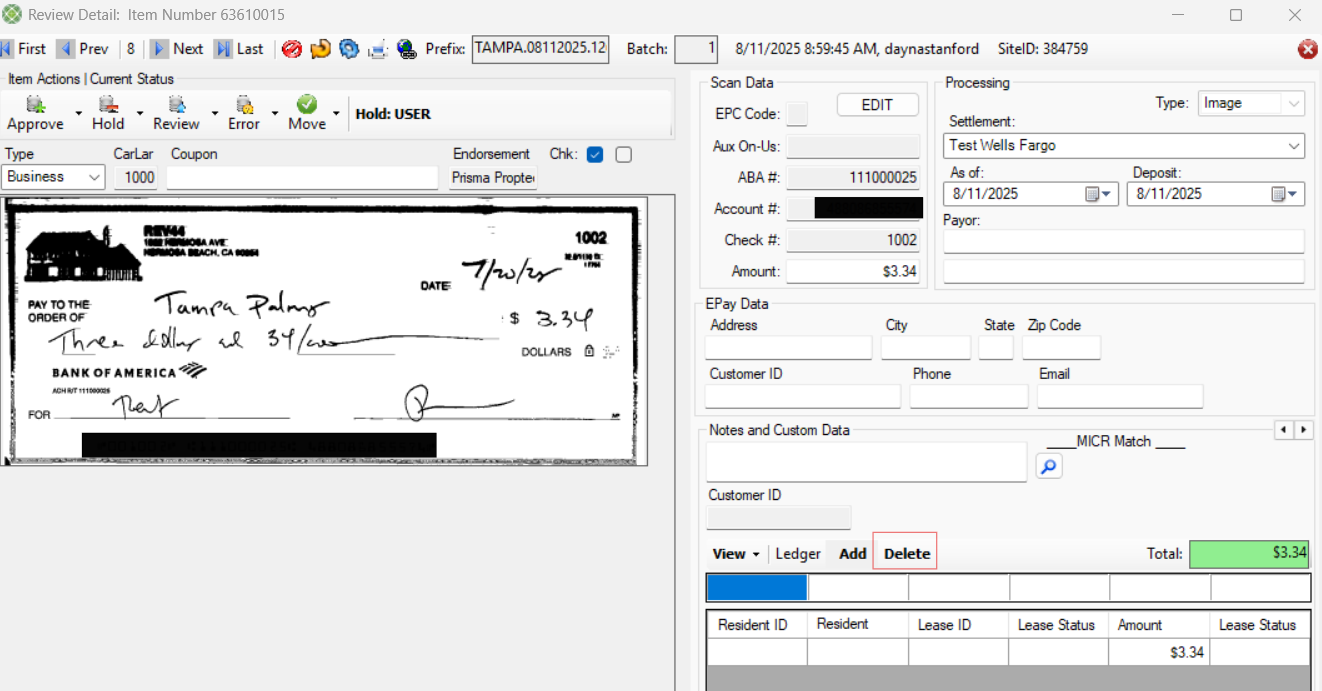
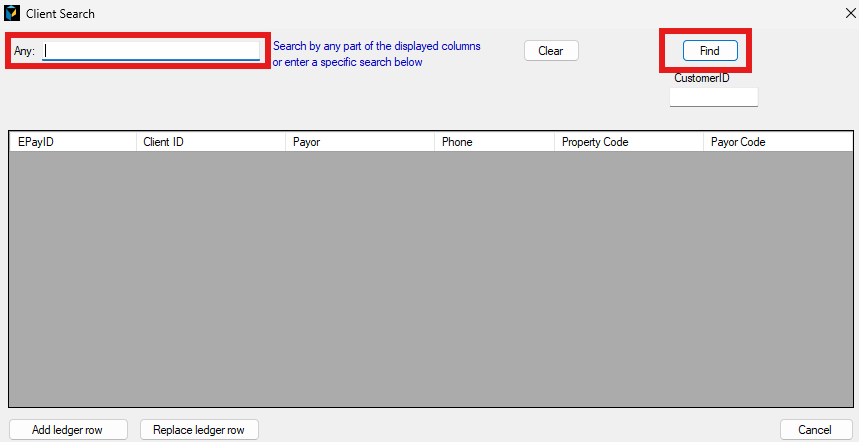
- Next, click the magnifying glass icon to search for the resident you want to associate with the image
- A pop up window will appear. In the search bar, enter the residents name as it is displayed in Prisma and click ‘Find’. If you need to split the check between multiple residents, you can add multiple residents but you will need to update the amount associated to each resident.
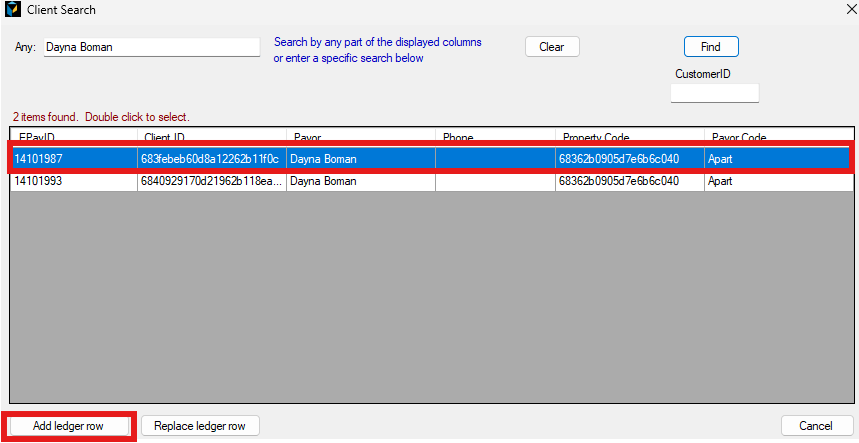
- Select the resident you want to post the check against and click ‘Add Ledger Row’. DO NOT DOUBLE CLICK TO INSERT
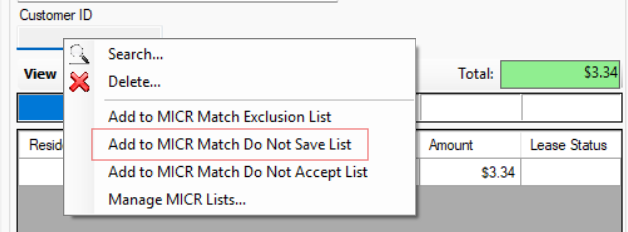
- For Cashiers Checks, you can also right click on the ‘Customer ID’ and select ‘Add to MICR Match Do Not Save List’. This will ensure future scans with that MICR line do not automatch.
- Once done, click “Approve” and then ‘Next’ to review the next item for matching
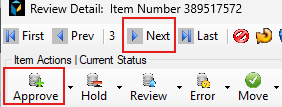
- In the event of any errors during the scan process, the error reason will display.
- After all the checks have been matched with a resident, go back to the ‘Scan Control’ tab
and click ‘Upload’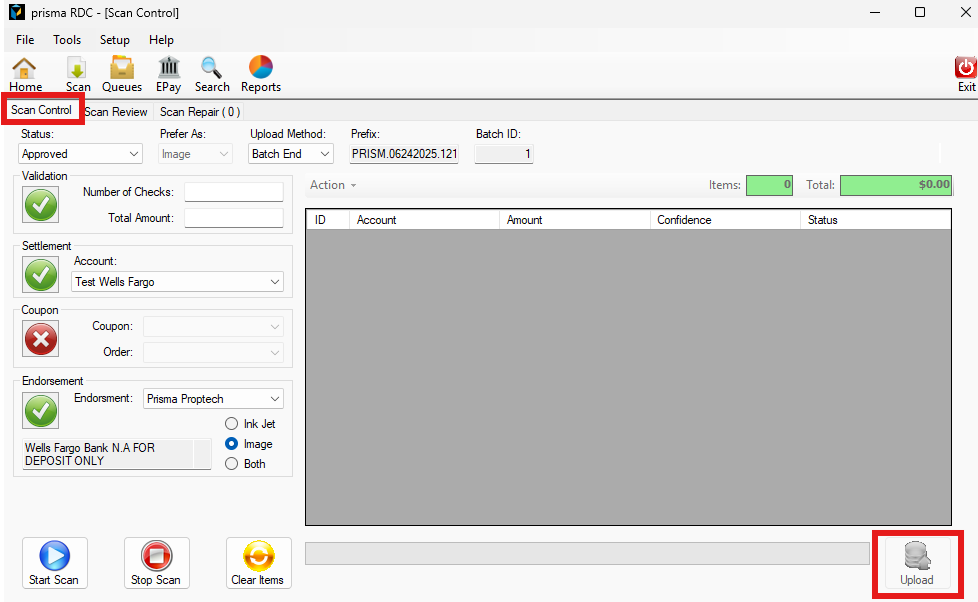
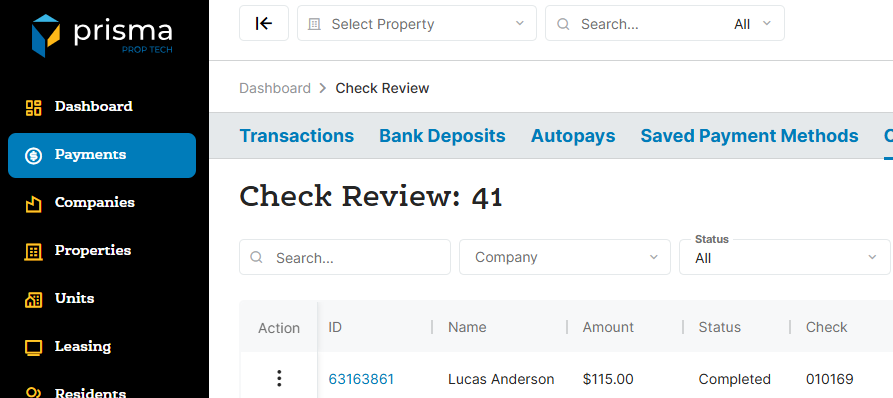
- Within five minutes, the check transactions will be created in Prisma and be picked up for processing. To view the transactions in Prisma, navigate to ‘Payments’ on the left side then click ‘Check Review’
- Once you are done, make sure you log out of the software after each use.
.